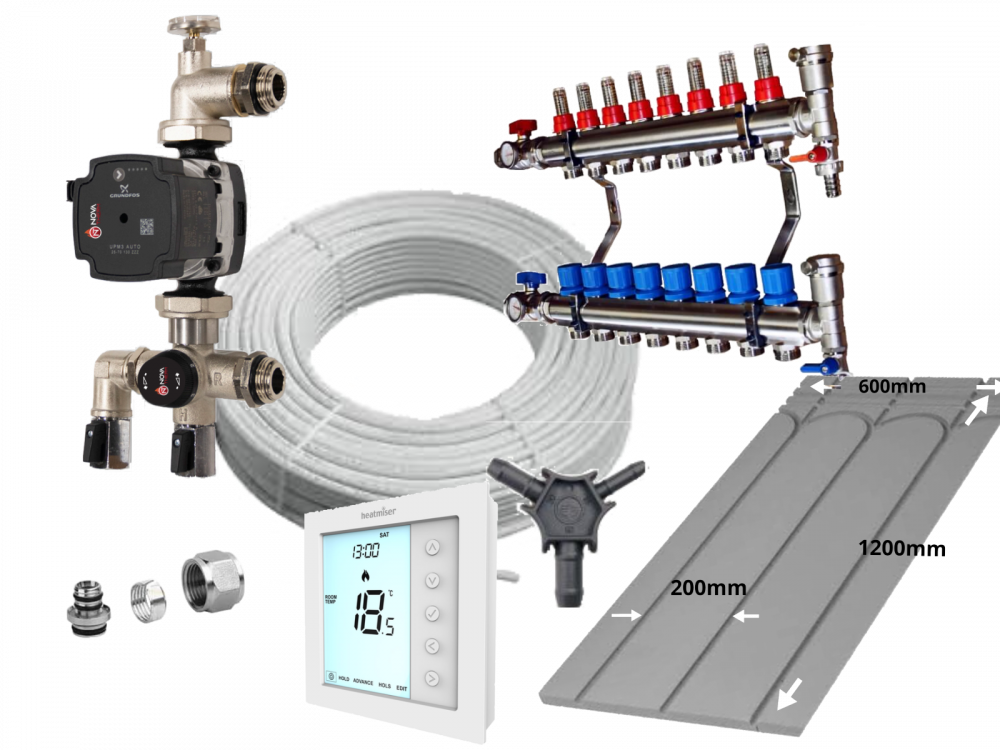
The Low Profile Tile Direct system kit is perfect for any room in the house or in a work setting too, offering heat without a huge heating bill.
But when there is no opportunity to dig down or the existing floor is floating, such as floorboards, you need a low profile, robust solution – and our underfloor heating kit is the answer.
Everything in one box
When we say everything is included in our kit, we mean it;
-- 18mm x 1200mm x 600mm Novatherm™ low profile solid floor tile direct panels for use on a hard sub floor or floating floor (x75)
-- An A-rated Grundfos 15-50/60 heat pump
-- Heatmiser Digital thermostat for easy control of temperature
-- 80m x 12mm Novatherm™ Professional grade MLCP plastic piping that doesn’t warp or split (x5)
-- Novatherm™ 5 Port Dualmix manifold faultless performance time after time Including: Manifold Isolating Valves x 2 - Temperature Guage x 2 - Lockshields with flow meters on each port - Drain/fill valves with blank cap x 2 - Automatic air vent x 2 - Metal fixing brackets x 2
-- 12mm - 3/4 Connector Cores (x10)
-- Reaming tool
Order online today
Ordering is simple.
Choose the right low profile overlay system size that you need and checkout using our secure payment method or use PayPal.
-- Remove all contaminants, dirt, grease etc from the substrate and make dust free.
-- Loose lay the boards across the floor and number the boards on the upper face to identify position of each board, making sure the pipework runs are calculated correctly to reach manifold position.
-- Uplift the numbered boards and prime the underside of the boards with Ultra Floor Prime-IT MSP bonding primer. This should be applied by brush or roller in a thin film. Allow to thoroughly dry to a clear green film ensuring primed face does not come into contact with other boards, walls or subfloor until it is ready to be bedded.
- -Drying time will depend upon ambient conditions but is typically between 1 and 4 hours.
-- Whilst the primer on the boards is drying commence with priming of the substrate using UltraFloor Prime-IT MSP. The primer should be diluted 3 parts water to 1 part primer and allowed to fully dry.
-- Apply flexible tile adhesive to the subfloor using a notched trowel to give a minimum 3mm adhesive bed. Bed the boards, primed side down, into the adhesive and ensure compression of adhesive ridges, ensure full compression of the adhesive to give a void free full adhesive bed. Additional use of screws and washers is recommended over timber substrates where needed, fixed at every 300mm. Allow to cure for approximately 4 hours to ensure the adhesive has gone through its initial set before carrying out any further works.
-- Pipe work may be fitted into the boards once they are all secure. Where possible this is best left until the following day. It is recommended that the pipe system is checked for leaks and correct water pressures prior to tiling over.
-- Prime the upper face of the boards with Ultra Prime-IT MSP bonding primer. This should be applied by brush or roller in a thin film. Allow to thoroughly dry to a clear green film, (approx 1-4 hours).
-- Apply Ultra Floor Level-iT 2 two part smoothing compound over entire floor area, making sure all voids and gaps are completely filled, the levelling compound should encapsulate the whole floor and cover the board with a 5mm layer on top.
-- Allow to cure for 24 hours prior to carrying out any tiling. Cold and/or humid atmospheres will delay the curing of Level-iT 2 so allowances should be made accordingly.
-- Prime the cured Level-iT 2 using Ultra Floor Prime-IT MSP diluted with 3 parts water to 1 part primer. Allow to thoroughly dry.


